What Happens?
Infrequently, when an image that is created as a "whole page" background in a print template is saved as a pdf, the contents of the image are not placed as expected. This may or may not not show up in the compose environment, but can be clearly seen in document Preview and will persist in the final output. This article discusses what causes the issue and how to fix it. For those interested, a more detailed explanation of what is happening is provided at the end of the article.
Requirements for Issue to Appear
All of the following must be present in the order presented, for the issue to occur:
- The original source is InDesign or Illustrator
- The original source is set up as a document/artboard with bleed in the document/artboard settings
- The image is the generated at the entire document/artboard size, INCLUDING BLEED
- The image is generated as a pdf
How to Adjust
The adjustment is to, temporarily, change the document/artboard dimensions to include the bleed when generating the image to be used as the background.
InDesign
Go to Document Set Up in the File menu.
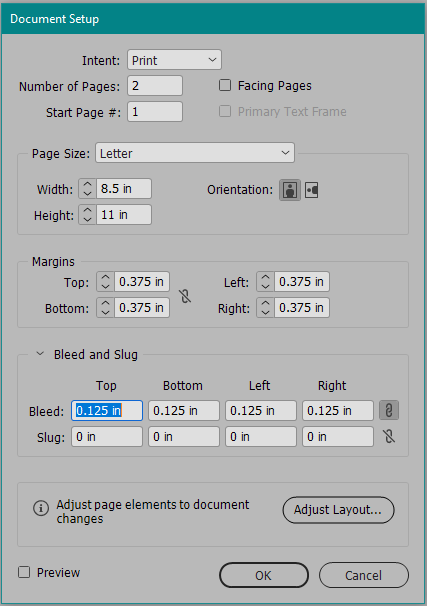
Adjust the document settings to include the bleed and remove the bleed from the document.
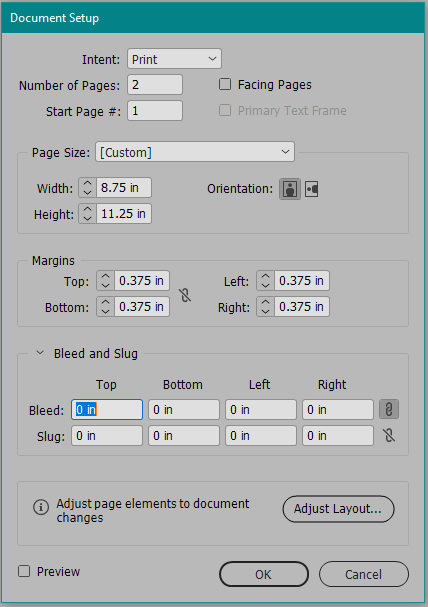
Generate the pdf for the background and re-set the document dimensions and re-add the bleed
Illustrator
Go to Document Set Up in the File Menu.
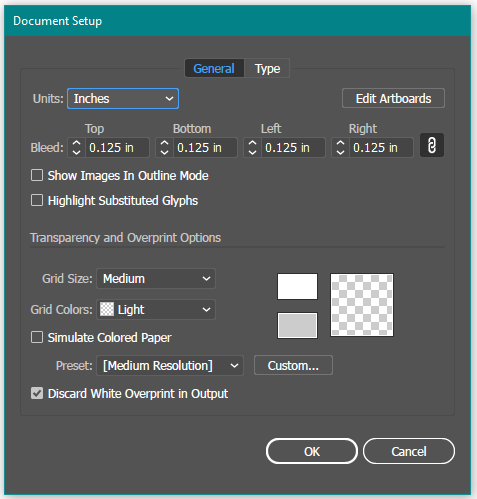
Remove the bleed numbers here and click "Edit Artboards."
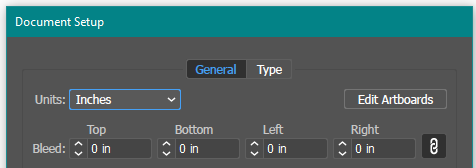
With the reference point set to the document center, change the artboard dimensions to match trim plus bleed:
From:

To:

Generate the pdf for the background and re-set the artboard and bleed dimensions.
What is Happening and Why?
There are four "container" dimensions that a PDF can have:
- art box - the box that defines the dimensions of a piece of content on the page
- crop/trim box - the document size
- bleed box - the box that defines the bleed dimensions (document size plus bleed)
- media box - the bleed dimensions plus extra for any marks.
What is happening in the case of a "whole page" background image is, since the contents are the entire page, the art box is defined by the page dimensions automatically by Illustrator and InDesign. So, although the image dimensions are correctly set at the bleed size, the contents within the image are at the artboard size - which, in our special case, is the trim size. This creates a discrepancy when the image is read by CampaignDrive - the image size is correct, but the art box is the trim size, so the art box is stretched to fit the image size, causing the issue. We cannot change the way that Illustrator and InDesign handle the art box, so what we do to fix it is temporarily adjust the document size to match the bleed size, forcing InDesign and Illustrator to read the art box at the correct dimensions.
Visual Demonstration of What Happens
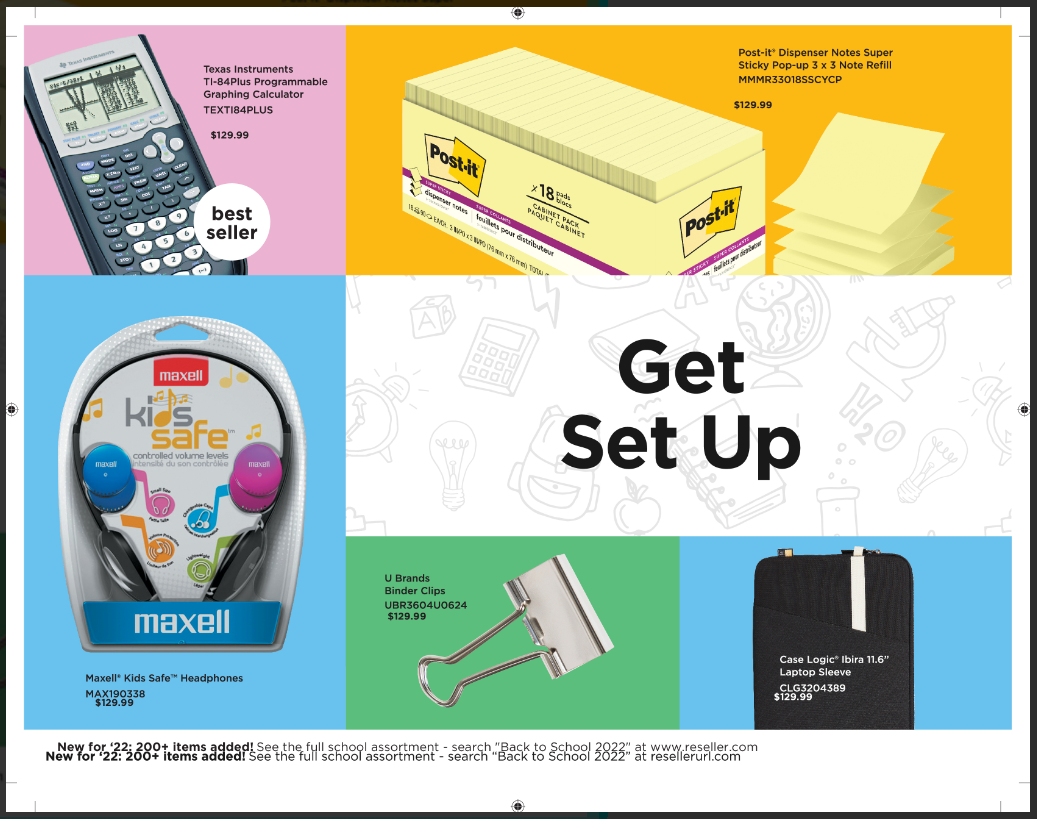
In the example below, the entire layout shown is a composite pdf background with the exception of the prices and the footer text.
This screenshot shows the correct placement - the prices are left-aligned and below the product information.
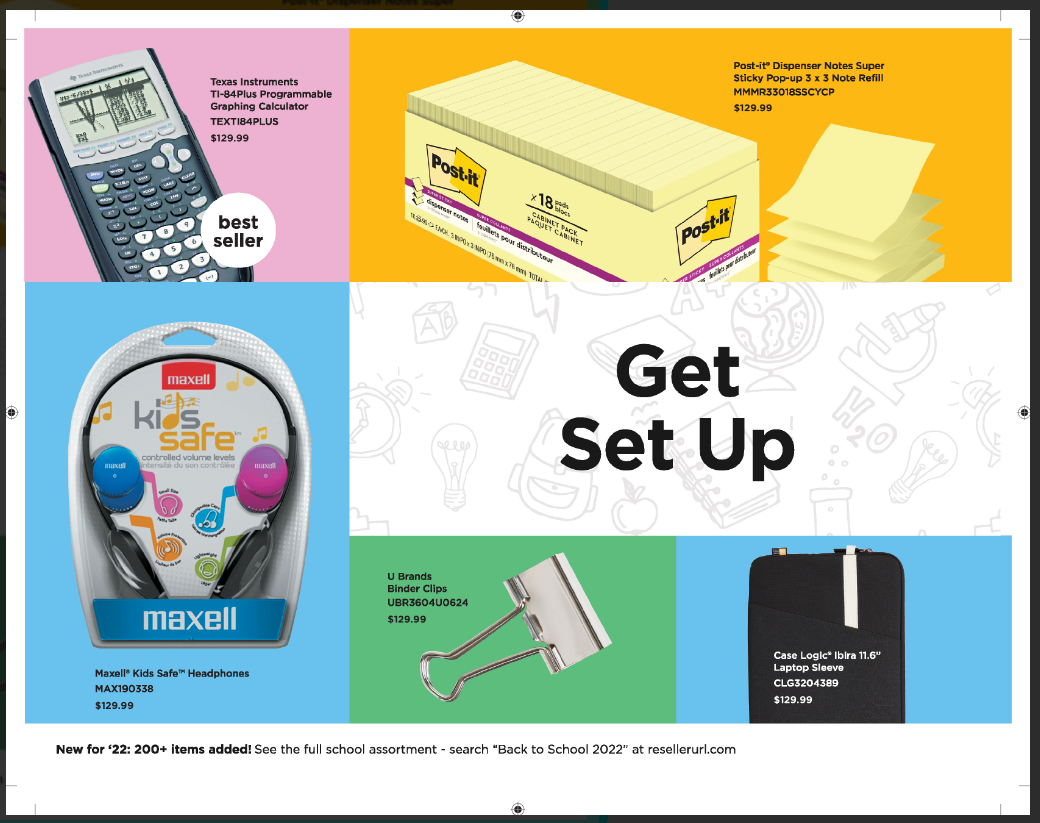
This screenshot shows the issue that can happen. The background is just slightly "off" in alignment: the prices no longer line up underneath the product text and are not spaced correctly. Note: the footer text has been shown twice to clearly demonstrate the shift in placement that occurs.