CampaignDrive has multiple ways to handle image layers that deliver the right amount of interaction for your End Users.
Selectability and Editability
There are two categories of options for images in CampaignDrive: selectability and editability. Selectability refers to the range of options for image choices and how those are delivered to the End User. Editability refers to the manipulation of an asset and how much freedom is given to the End User. This can range from zero interaction all the way up to the ability to upload their own images, add new image layers to templates and re-size and crop images freely. The level of control may vary by material type, type of content, and the End User audience customizing the piece.
CampaignDrive has multiple features to deliver the right level of selectability and editability for the End User, giving Template Composers great flexibility and control to deliver the preferred amount of interaction for that particular template. For images, these features are a combination of controls in the Image Layer modal and the assignment of the image to groups or databases.
Selectability Controls within the Image Layer Modal
Selectability is the permission for the End User to see options for image content and be able to choose it for placement onto a template. Below are the different image selectability controls inside the Image Layer modal, ranging from the most to least restrictive. Some of these features are controlled entirely by the Image Layer modal and some are controlled by settings in the modal in conjunction with other features.
Content Lock: ON
No Interaction: The Image Layer is Fully Locked
When an End User should not have the ability to either select or edit an image layer, Template Composers have the option to fully lock that image layer from the Image Layer modal inside Template Compose. This setting means an End User cannot change the image and they cannot reposition or resize the image layer. To do this, the toggle for "Position Lock" and "Content Lock" is set to On. These settings remove the link to the layer in the left-hand menu on the front end, removing the End Users ability to interact with the layer in any way.
Example
Back-End View of an Image Layer that has been fully locked:
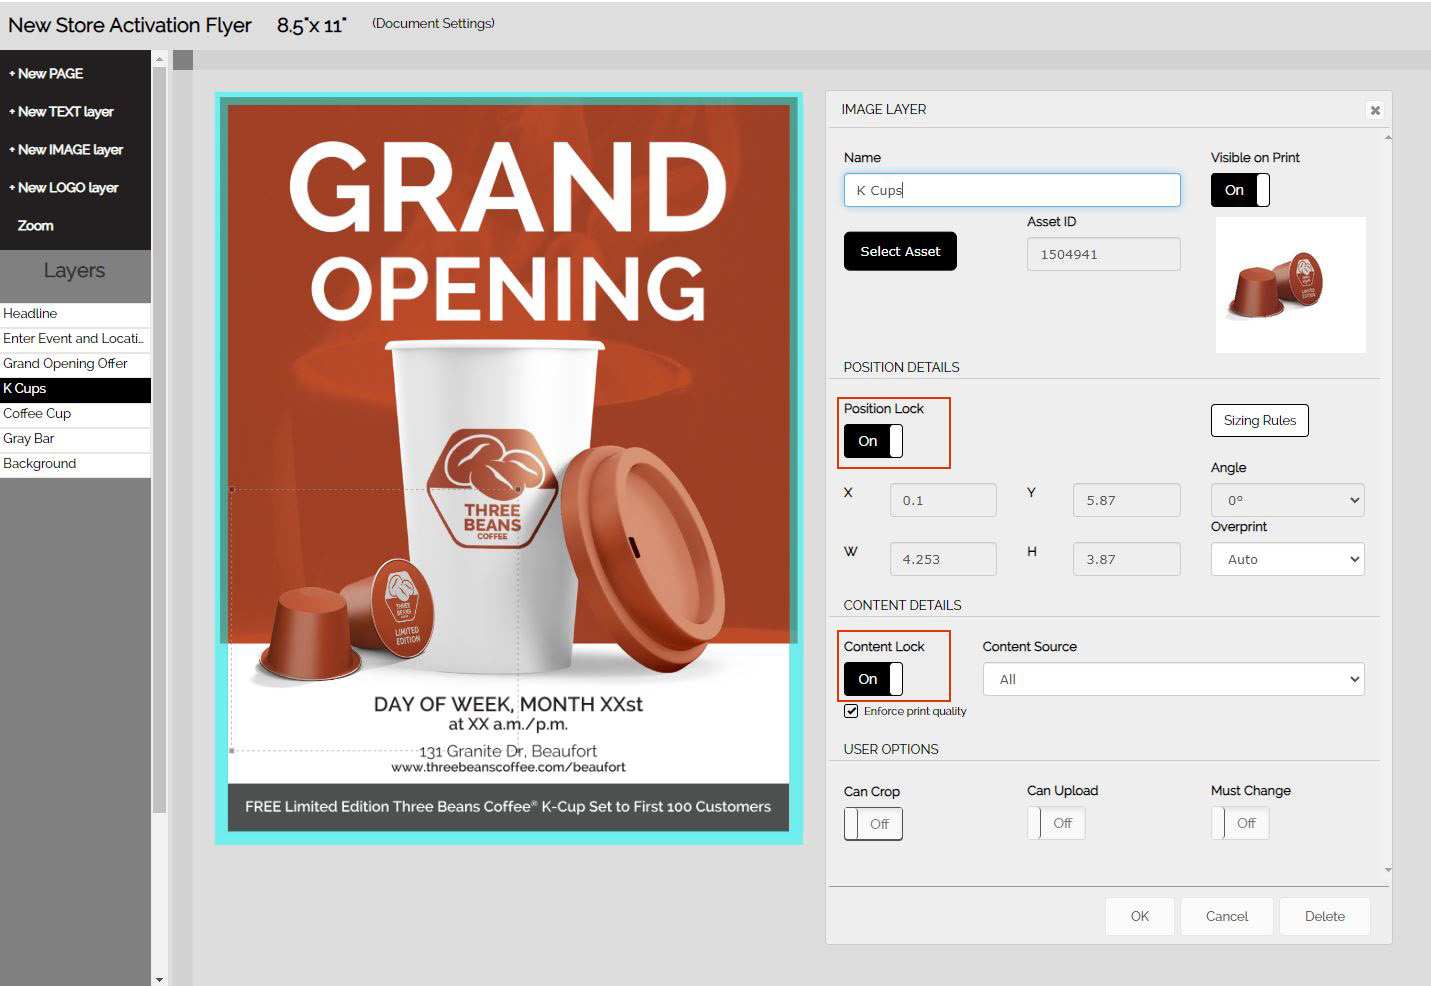
Front-End View of the same template:
Note that the End User has access to only 2 layers on the front end of the template - the other 5 layers have been position- and content locked, effectively rendering them as part of a static background that the End User can't change.

Administrator-Controlled Selectability with the Content Database and Location Content Items
The most limited form of selectability is when the image changes on a template according to a setting OUTSIDE of the template itself. This is most commonly done using the Content Database to deliver a location-specific asset, such as a logo. The End User, in this case, does not make any image selection because the image delivered is based on location, which the End User has already selected and which tells CampaignDrive which logo to place onto the template. The image layer on the template is then locked for position and content.
Content Lock: OFF
When Content Lock is set to Off in the Image Layer modal, content becomes available for selection.
Selection of an Image Using the Content Database
The Content Database can be used to deliver individual images. This is generally used for small asset sets that are to be used site-wide, such as logos. For deploying large sets of individual images, Content Groups delivers a simpler and more easily managed experience.
For this experience to occur, the image layer's Content Lock must be set to Off and Content Source set to Content Links.
Example
Back-End View of an Image Layer that Uses the Content Database
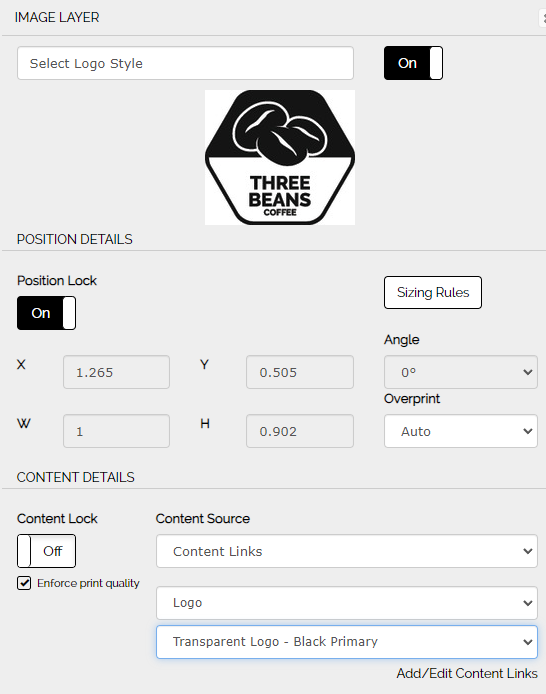
Selection of an Image Along with Other Content using the Content Database
One of the most powerful features of the Content Database is to tie relevant content together. This content can be text, images, or both. In this case, the selection of an image is part of a larger content selection, such as a headline and body copy. Sometimes the image might be the driver of the other content and sometimes the other content might determine the image selection. In either case, however, the user doesn't choose between individual images, but between the entire set of content that will appear in a drawer that will open on the right-hand side of the screen when they click on the layer associated with the content link.
For this experience to occur, the image layer's Content Lock must be set to Off and Content Source set to Content Links.
Example
Front End View of the Content Drawer with Image and Text Content
In this multi-product sell sheet, End Users update the text and images as a set, driven by the selection field at the top of the page. Changing their selection will automatically change the text and image together. They don't individually select the image

Selectability of an Image In Addition to Other Content Using the Content Database
There is a field type in the Content Database called "multi-image." When this field is used, the End User will have the ability to select from a limited number of images that have been pre-selected by the Administrator. In this case, the End User experience is very much the same as described above, with the addition of a button underneath the asset thumbnail to indicate that a selection can occur.
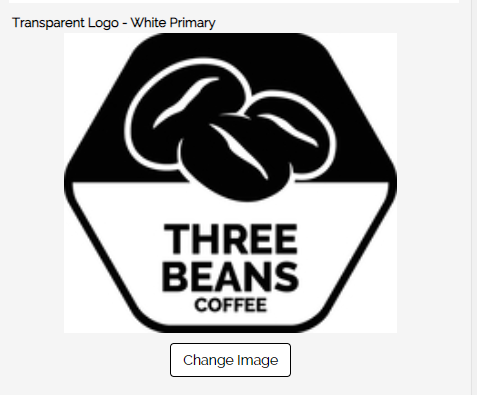
When the button is clicked a pop-up opens to allow the End User to make a selection:
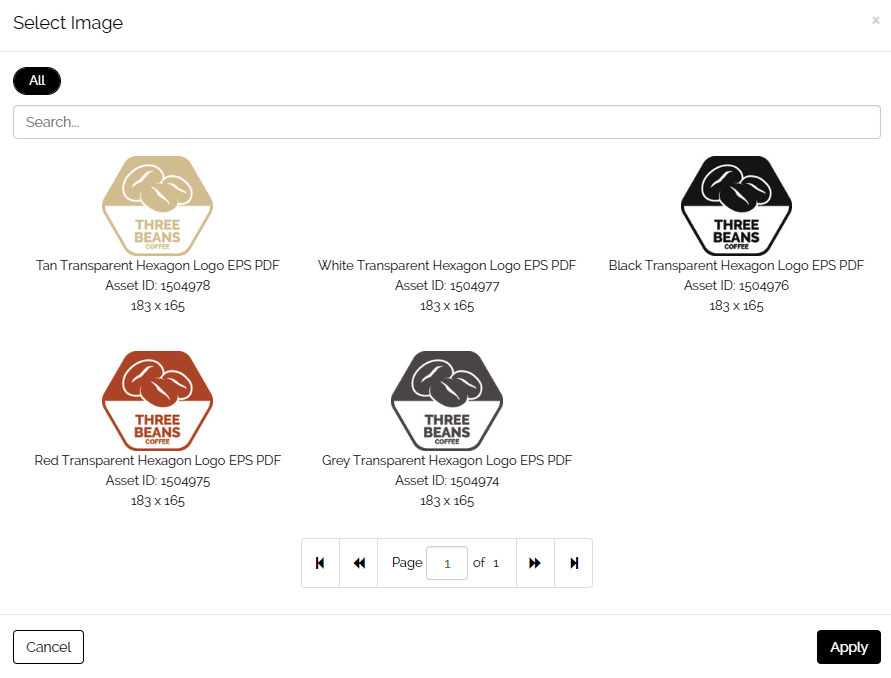
For this experience to occur, the image layer's Content Lock must be set to Off and Content Source set to Content Links.
Selection from a Group of Assets Using Content Groups
Content Groups allow End Users to select from a group or groups of images, either based on asset categories in the Media Library or based on specific Asset IDs. Generally speaking, Content Groups based on Asset IDs are more restrictive and have fewer options than those based on an entire Asset Category. Content Groups are a way to quickly make many image selections available for an image layer.
The End User will be able to select any available image in the group from a drawer that will open on the right-hand side of the screen when they click on the image layer.
For this experience to occur, the image layer's Content Lock must be set to Off and Content Source set to Content Groups.
Example
Back-End View of an Image Layer with Content Groups Applied
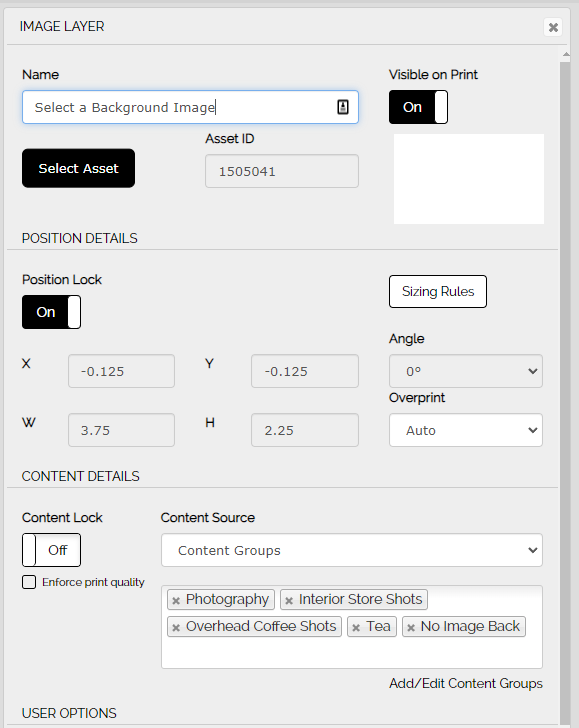
The Content Groups that have been applied show up in the field below the Content Source.
Note: More than one Content Group can be applied to the image layer.
Front-End View of the same template:
All of the Content Groups applied to the layer show up as tabs in the drawer. They will appear in alphabetical order in the drawer, not in the order selected on the back end.

Complete Access to the Media Library
When no selectability controls are set, the End User has complete access to the entire Media Library. This is not generally recommended because this opens up the potential for assets to be used in templates that should not be. In the next section, we will talk about other selectability controls that are used outside of the template compose environment that can help prevent this.
For this experience to occur, the image layer's Content Lock must be set to Off and Content Source set to ALL.
Enabling User Uploads
The "Can Upload" permission enables End Users to upload their own images for use in the image layer. This setting can be used in conjunction with content groups, but not with the content database.

Once an End User has uploaded an image into a template, the asset will be stored in the End User's My Assets area and will be available for future use in templates by accessing the Mine tab.
For this experience to occur, the "Can Upload" button is set to On, which makes the Upload button visible.
Other Selectability Controls
There are a number of places outside of the Image Layer modal that can control the visibility of images for End User selection.
Asset Controls in the Media Library
Each asset in the Media Library can be associated with a region or a location or be designated as "Admin Only." Each of these controls can help limit what End Users can select in templates. It is important to know that, although services can be applied to an asset in the Media Library, this service does NOT prevent an End User from seeing this asset when selecting it for use in a template.
Content Item Controls in the Content Database
Content Items within the Content Database can be assigned to individual locations or location groups. When these segmentation tools are used, the content item will only be visible to the specific location or location group. If segmentation is not used, the item will be visible to everyone.
Enabling New Image Layers
There is a specific permission that allows End Users to create a new image layer inside a template. This permission is located in the Campaign Item Management modal for the template under User Options.
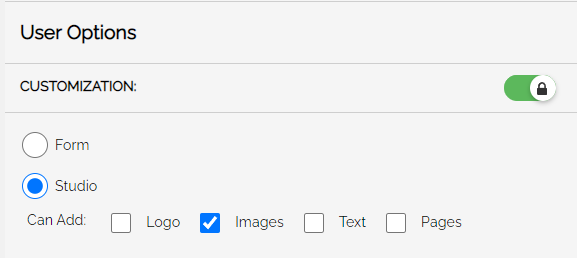
When enabled, the link to add a new image layer is present on the front end above the Zoom link. When clicked, the image drawer opens with the entire Media Library shown and the upload image button present. End Users do not have the ability to crop images placed on the template with this method, nor do Template Composers have the ability to restrict End Users on what type of content they can upload.
Note: If End Users are uploading their own images, it's possible to have these documents go through an approval loop before being released to the End User.
Editability Controls
Editability is the level of manipulation provided to the End User to adjust or alter the content of a template. Some editability functions can impact the selectability of images.
Selectability without Editability
The most restrictive editability on an image slot is to just allow selection without any editability. In order for an image to be eligible for selection, it must have the identical aspect ratio (width and height) of the original image. If "enforce print resolution" is enabled for that image layer then the replacement image must also be at least the same resolution as the original image.
For this experience to occur, the image layer's Content Lock must be set to Off , Position Lock must be set to On, and Can Crop must be set to Off.
With these settings enabled, it is likely that there will be images in Content Groups or the Media Library which will now not be selectable by the End User either because they are not the right shape (not the same aspect ratio) or are too small. These images will be covered by a gray mask indicating the reason they are not selectable.
Cropping Enabled with Position Lock
Enabling cropping creates greater editability and selectability for your End Users. Cropping enabled works for all three types of image sources: Content Groups, Content Links, and All.
The more restrictive use of cropping is when it is combined with the Position Lock functionality. Having both of these settings enabled will allow your End Users to crop their selected image to match the original image slot, increasing the number of images available for selection by removing the aspect ratio requirement.
For this experience to occur, the image layer's Content Lock must be set to Off , Position Lock must be set to On, and Can Crop must be set to On.
Cropping Enabled without Position Lock
When the position lock is removed and cropping is enabled, your End User is allowed to replace the image and crop it to any aspect ratio they like. This is often only used in specific cases, such as adding a partner logo and often is combined with an approval loop as this provides great freedom to End Users and should be used with caution.
For this experience to occur, the image layer's Content Lock must be set to Off , Position Lock must be set to Off, and Can Crop must be set to On.
Cropping Disabled without Position Lock
This combination is almost never used as it creates an undesirable user experience. In this case, when the End User replaces the image, it will fill the image layer at the original layer width and adjust the height to match the new image. The End User is free to move the image and re-size it as they wish, but they have to use the entire canvas of the new image and the size of the old image layer is lost. We would, in almost every case, recommend enabling the Can Crop feature.
For this experience to occur, the image layer's Content Lock must be set to Off, Position Lock must be set to Off, and Can Crop must be set to Off.
