Parts of the Image Editor
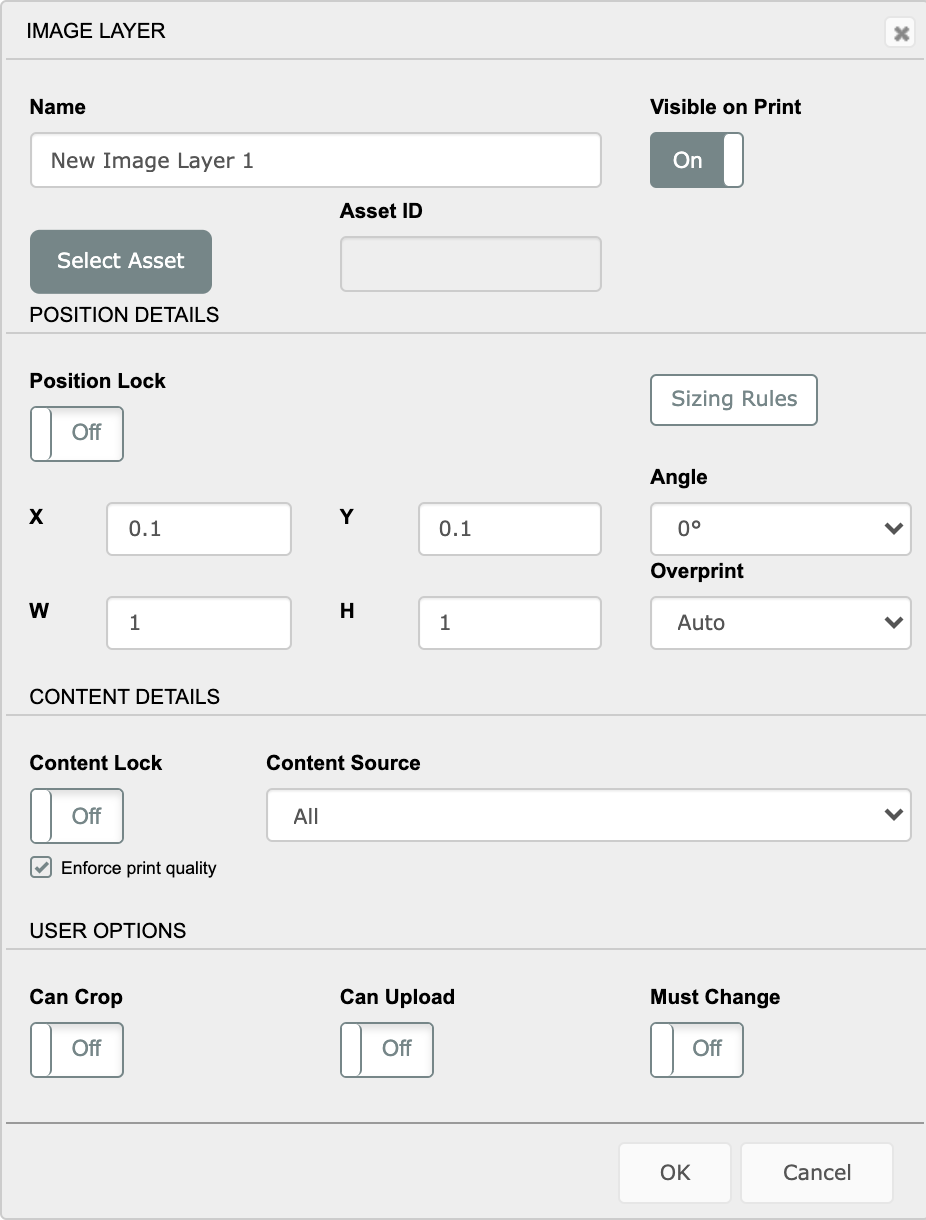
Name: The Name of the Layer - this will appear as a linked button on the left side of the page, under the buttons to add text and images. You can click this button to edit the layer as well.
Note: The layer name is End User facing (unless the content is locked - see below).
Visible on Print: On by default. If turned off, the image layer will show in the editor, but not on the final document. This is useful for items such as die lines or instructional graphics.
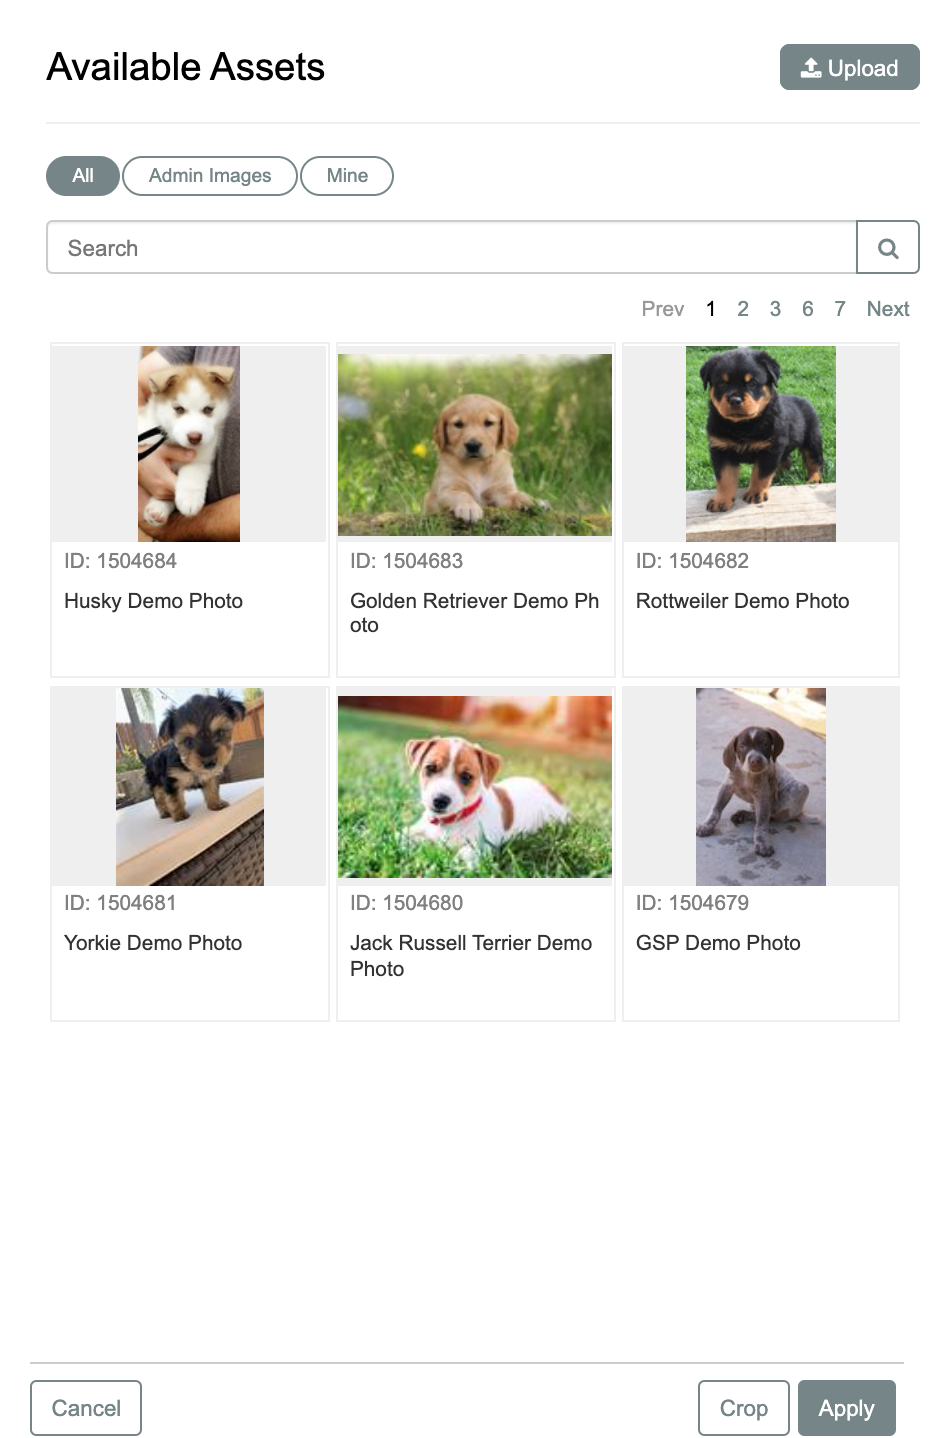
Select Asset: Clicking this button will open the image selection drawer. This is the same drawer that an End User will see when selecting an image.
Position Lock: Turning this on will lock the position of the text layer
Sizing Rules: Used for dynamically sized templates.
X|Y: Used to place the text layer. The upper left corner of the template is 0|0.
Angle: The angle, in degrees, of the text box. Image layers may only be positioned at 0, 90, 180 or 270 degrees.
W|H: Width and height of the layer (in the measurement type specified in document settings).
Overprint: This turns on the overprint specifications within the PDF document. This is a feature that a printer will specifically ask for.
Content Lock: Used to prevent an End User from interacting with the layer. Content lock removes the layer link from the left-hand menu on the front end. However, unless Position Lock is also used, the layer can still be moved on the back end, so it is advised that Position Lock is used with Content Lock to prevent the layer from getting moved accidentally during editing.
Content Source: Used to apply content management to the image layer. When initially creating an image layer, leave this as “ALL” until the image layer is sized and positioned where you want it and then go back and add the content management to the layer.
Enforce Print Quality: Used only in print templates. Prohibits the End User from using an image that is smaller in dimensions than the original image. For example, if the image layer is 6” x 6” then any image that has a dimension less than 6” cannot be used.
Can Crop: When enabled, the End User can crop the image. If Position Lock is on, the cropper restricts the aspect ratio to that of the image layer. If Position Lock is off, the cropper can be any aspect ratio.
Can Upload: When enabled, the “Upload” Button is visible in the image selection drawer and End Users can upload their own images. Note - these images are NOT stored in the Media Library and are not visible to Admin Users, nor can Admin Users delete these images - they are strictly tied to the Users account. The End User, however, has access to these images in the future.
Must Change: Used when a placeholder image is used as the default. This will require the End User to change the default image before they can finish the document.
Image Warnings
Asset Too Small for Slot
Conditions: "Enforce Print Quality" Set to On
Any images that are smaller than the dimensions of the image layer will be greyed out and unavailable for selection. The End User will see a warning "Asset Too Small for Slot" over the image (pictured below).

Invalid Aspect Ratio
Conditions: "Position Lock" Set to On and "Can Crop" Set to Off
When both "Position Lock" is set to On and "Can Crop" is set to Off, only images that have the same aspect ratio as the original image can be used. The End User will see a warning "Invalid Aspect Ratio" over the image (pictured below).
