Allow your End Users to select or edit copy and select/upload their own photos within this simplified experience.
The Form Interface
The Form interface in CampaignDrive provides an alternate customization experience to the End User where they can select or edit copy and select photos using a form interface. The Form UI is laid out in three columns:

Left Column: Displays the name of the template in the left column and has a field to edit this name. The CampaignDrive Batch experience uses this form view layout. If an End User has selected multiple templates using the Batch functionality then each template in the batch will appear in the column. The End User can toggle between templates by clicking on the template name. The button for the active template is white.
Middle Column: Contains the available input fields. These fields are determined by text, select, user and location tags and any images that are not content locked. Note that the Form UI currently does not support linking to the content database, so content links and content database tags cannot be used in the form interface. If form cannot be enabled on a given template, check to make sure that there are no content links within the template.
Right Column: Contains a preview pane which will show a low-res PNG rendering of the final artwork to ensure a quick load time. Selections, particularly text, may appear grainy in the preview; however, they will generate clearly in the final document generation. The preview pane will display the contents of the artboard area, any items outside of the artboard area (such as instructional text), will NOT appear. To update the preview, users click the "Update Preview" button in the lower right corner to apply their edits to the preview pane.
PRO TIP:
If you don't want a tag to appear in the preview, but do want it to appear in the middle input area for End Users to interact with, place the tag outside the artboard area in the template. This is "outside" the printable area and therefore will not appear in the preview area, but will still be picked up by the form area.
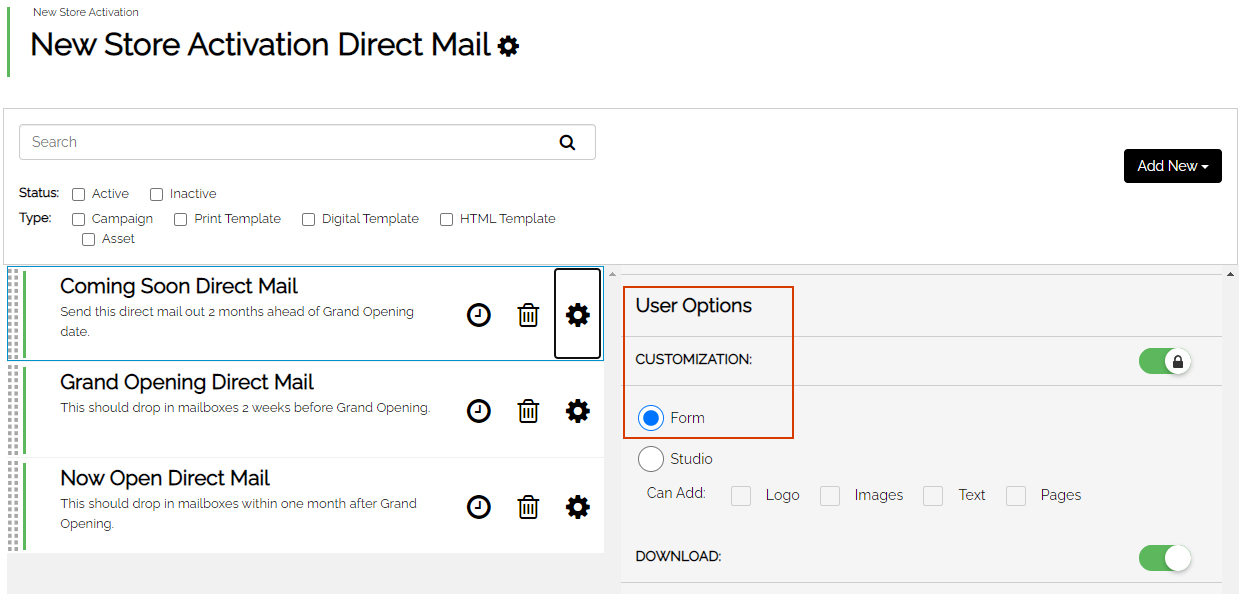
Applying the Form Interface to Templates
Assigning the Form UI to a template is done inside the campaign management interface. Click on the gear icon next to the template on which the Form interface is to be applied. Under the "User Options" section, switch the interface from "Studio" (which is the default), to "Form." Note that, as explained above, if a content link is present in the template, Form cannot be applied.