How to set up registration so new users can submit a request for access that will be approved by a System Administrator or automatically be granted access upon registration.
Introduction to Registration
CampaignDrive has three methods for adding new users to the system:
- Manual entering of users by an Admin
- Importing users as part of a feed, either one-time or recurring.
- Enabling and configuring the self-registration form.
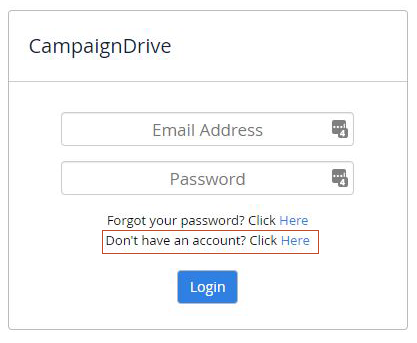
When CampaignDrive is set to allow self-registration, users may either be allowed immediate access or go through a request review and approval process. In either case, with the activation of self-registration, the link to the registration form is made visible on the log-in page:
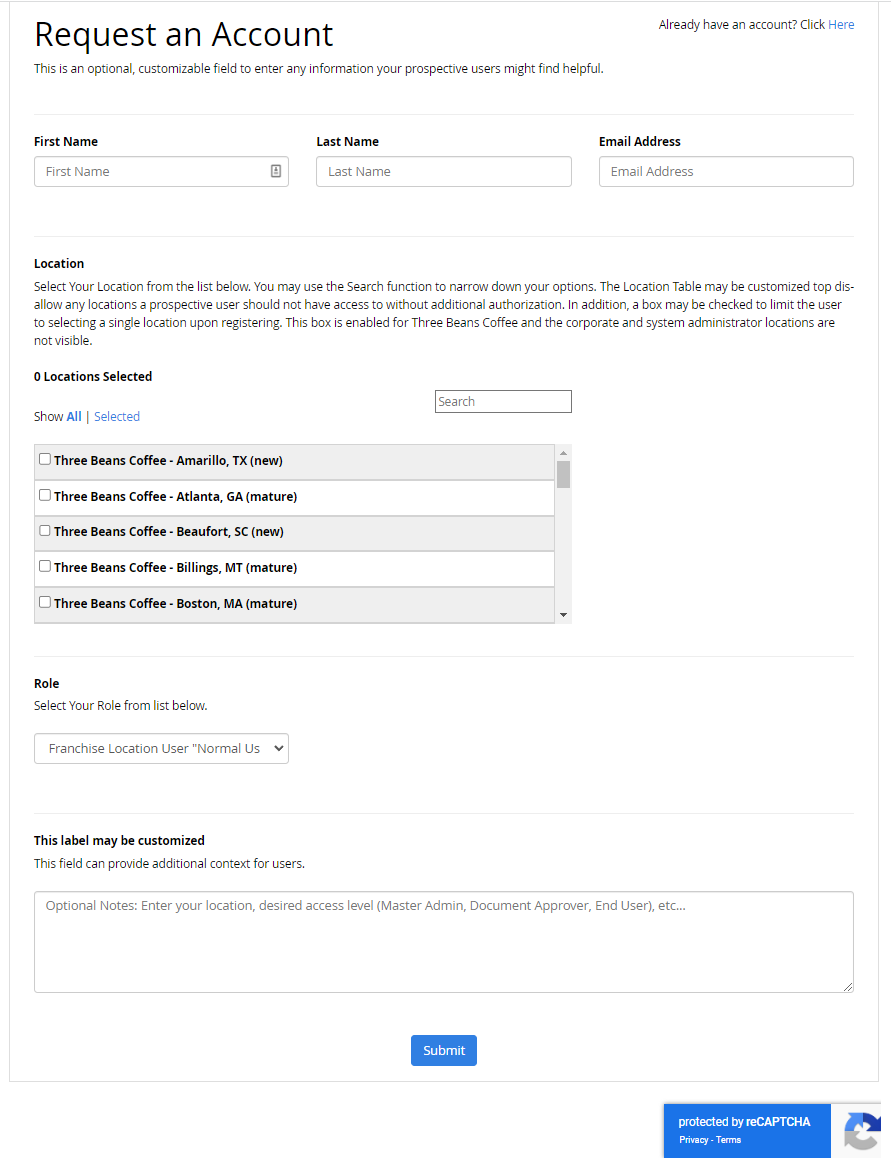
After clicking the link, prospective users will be taken to the registration page to fill out their information:

The controls on the form can be customized by the Admin depending on the intended workflow for the end user.
Steps to Setting Up Self-Registration
- Set Up or Edit a User Role to Manage Self-Registration. This role will need to have “Can Approve/Reject Pending Users” enabled. Enabling this permission displays the link to the "User Registrations" page in the main navbar. The self-registration settings and form management are located on this page. This role can be specific to registration or be part of another admin role.
- Assign Users to the Role, if the role is new. If the permission is enabled on an existing role, then any User with the role will become a User Approver and will receive notifications of new users. At least one person must be assigned to this role.
- Configure the User Registration Settings Page. Set the "Self Registration" button to "ON." Leave the "Auto Approval" button turned "OFF" if approvals are required and turn it "ON" if auto approval will be used. Note: If auto approval is used, then the "Location" and "Role" fields must be enabled on the registration form.
User Registration Controls
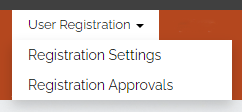
Self-Registration is managed from the User Registration tab on the main navbar. The Admin will set the controls on the Registration Settings page and manage approvals, if necessary, from the Registration Approvals page.
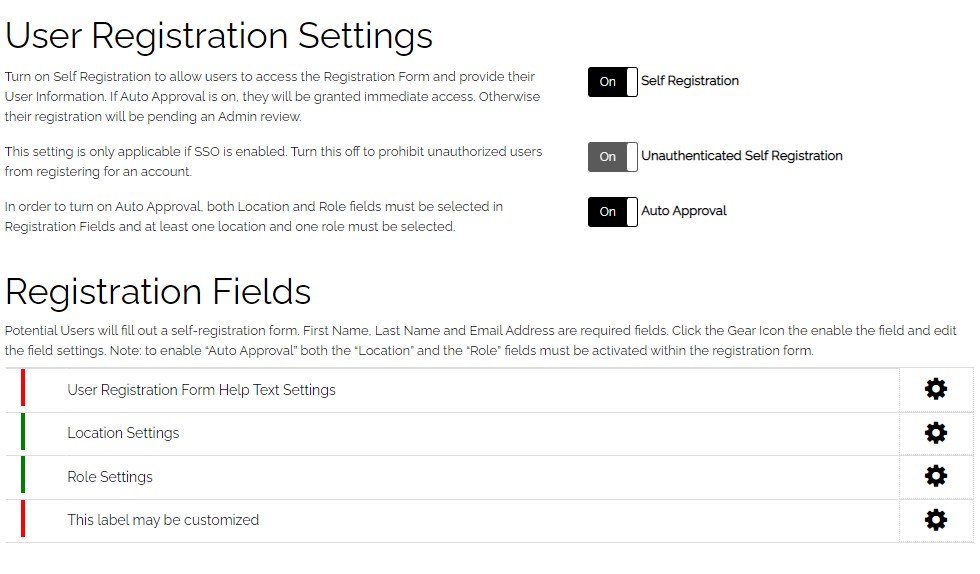
Registration Settings
Self Registration: To enable self registration, toggle this button on. When this button is turned on, the registration fields table will appear.
Unauthenticated Self Registration: This button cannot be adjusted unless an SSO is present. Consult with your Customer Success Manager before toggling this button off when using an SSO.
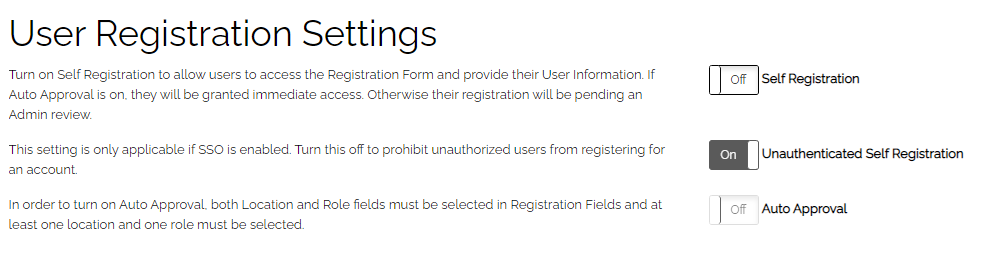
Auto Approval: Auto approval controls whether or not a user is granted immediate access to the system or must go through the review process. In order to turn auto approval on, the registration form must be set up to have the location and role fields visible. This is because a user must have both a location and a role in order for their account to be created. By default auto approval is set to "OFF: and all optional fields in the registration form are hidden.
Auto Approval "OFF"
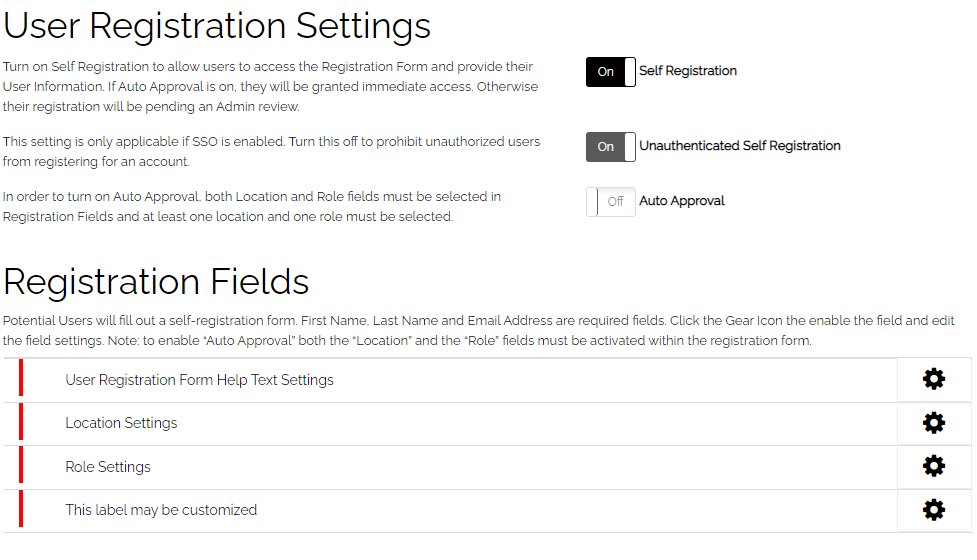
Auto Approval "ON"
The Registration Form
Registration Fields
The basic registration form looks like this:

There are four fields that can be added to the registration form:
Help Text: A field that can provide guidance to prospective users.
Location Selection: A field that allows users to select their location or locations
Role Selection: A field that allows users to select a role
Customizable Text field: A field that can be added to allow users to enter text information when they fill out the form.
The registration form with all optional fields enabled looks like this:
Help Text
To add help text, click the gear icon on the Registration Fields table. The pop-up will appear with a field to enter your text. The help text will appear at the top of the form. To activate this field, toggle the "Active" slider and hit the "Save" button.

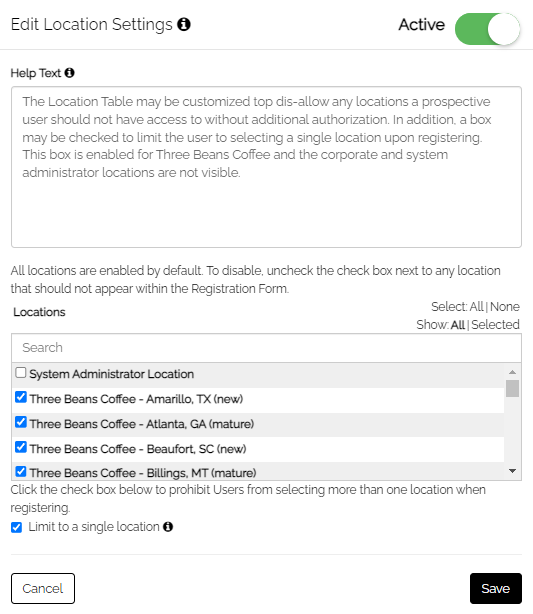
Location Selection
To add the location selector, click the gear icon on the Registration Fields table. The pop-up will appear. There is a box to enter help text to guide the user in location selection. There is a table with all locations entered in the system. All are enabled by default. To hide any location, simply uncheck the box next to the location name. There is also a box that can be checked to limit the user to a single location selection. To activate this field, toggle the "Active" slider and hit the "Save" button. This is one of the two fields that MUST be active in order to enable auto-approval.
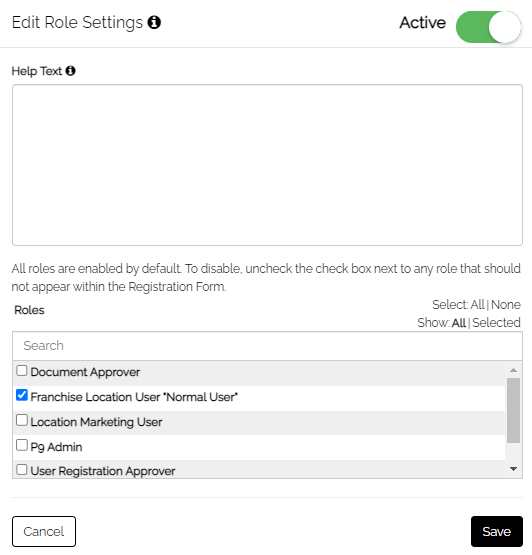
Role Selection
To add the role selector, click the gear icon on the Registration Fields table. The pop-up will appear. There is a box to enter help text to guide the user in role selection. There is a table with all the roles entered in the system. All are enabled by default. To hide any role, simply uncheck the box next to the role name. Users may only select one role. To activate this field, toggle the "Active" slider and hit the "Save" button. This is one of the two fields that MUST be active in order to enable auto-approval.
Optional Comments Box
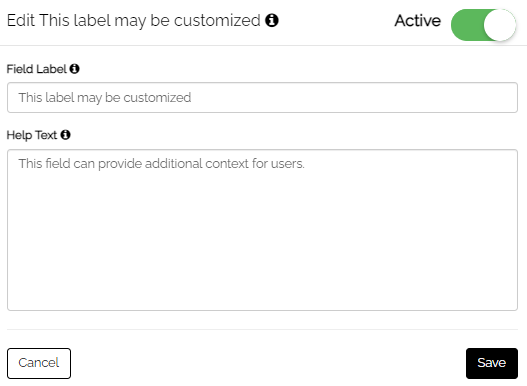
This field that can be enabled to allow prospective users access to a text field and will appear at the bottom of the form. The field can be used for any text - comments by the prospective users or as an additional field for Admins to gather any custom information they may need during the registration process. Note that both the label of the field is entered as well as help text for the field. Once the label is updated, that is what will appear in the Registration Settings table as well as the title of the pop-up box.
Registration Approvals
If "Auto Approval" is turned off, then an approval process is automatically put into place. Anyone who fills out the registration form will be placed into a table on the "User Registration Approvals" page pending review of their request.
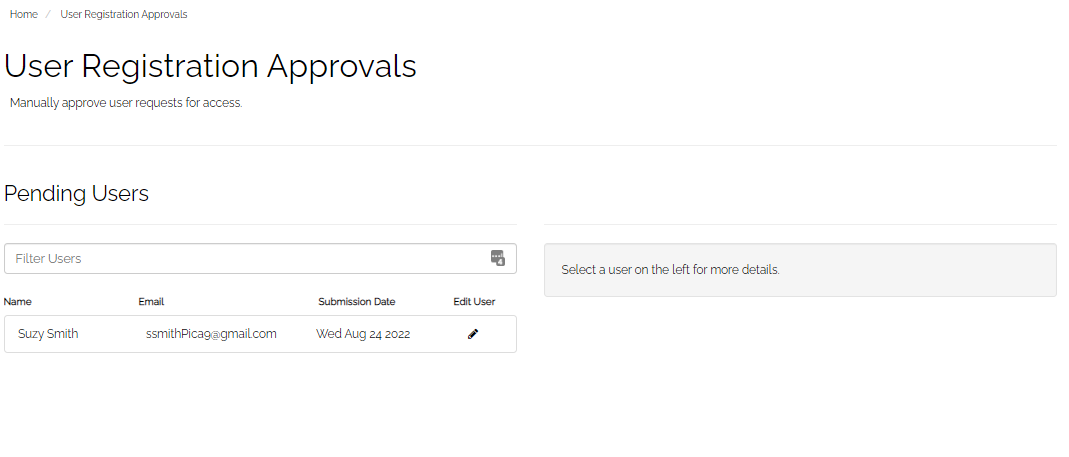
To view the details of the registration form for any prospective user, click on the "Edit" pencil in their row on the table.
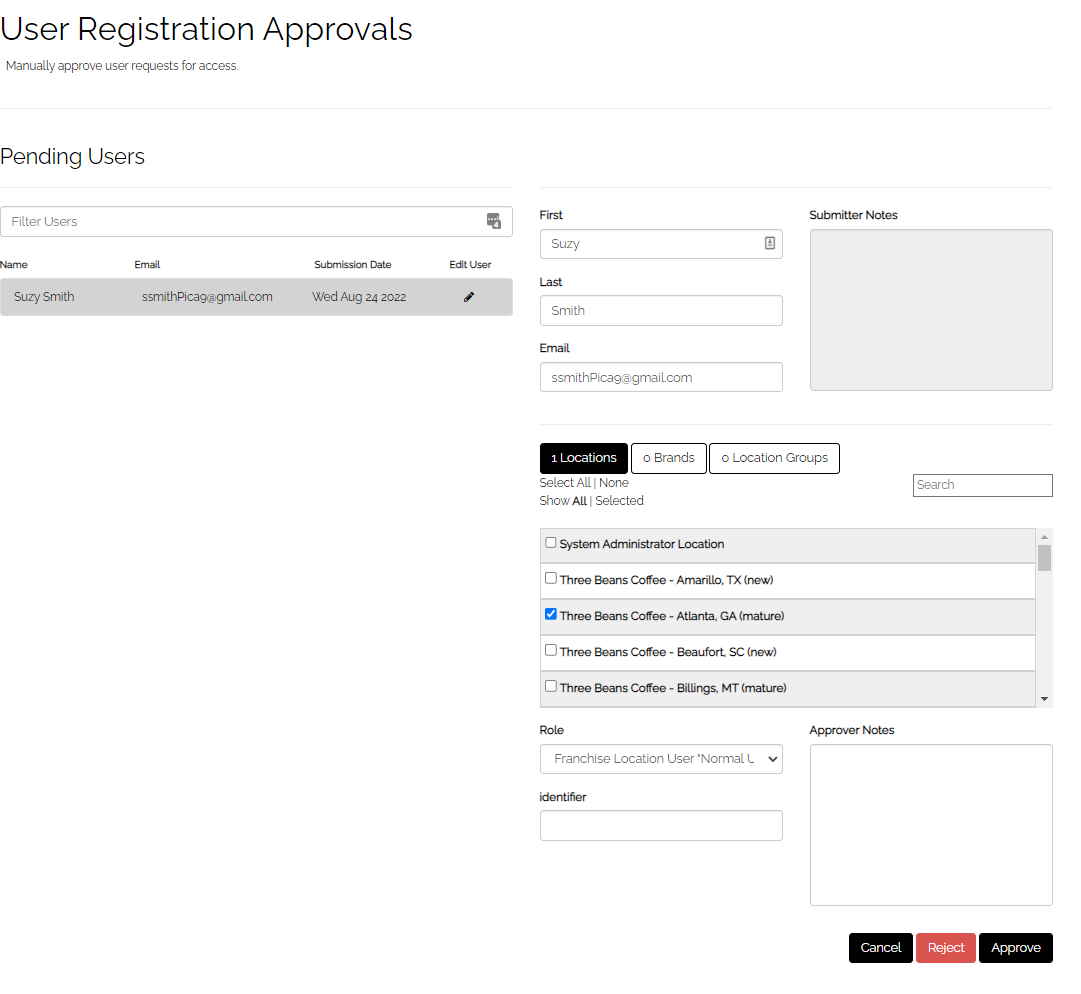 A form will appear on the right side of the page with the details of the entries made by the prospective user. The Admin can choose to reject or approve the registration, can make any changes necessary to the entries and also send a note to the prospective user by typing in the "Approver Notes" field. Note: If the request is rejected the Approver MUST include an entry in the Approver Notes field. If no action is desired at that time, click the cancel button to hide the entry.
Registration Workflows
This section is a summary of the process of self-registration.
When self-registration is enabled, an additional link appears on the log-in page: "Don’t Have an account? Click Here:” Upon clicking the link, the user will be prompted to fill out the form.
Approval-Based Registration
Upon clicking the "Submit" button, the user will see a success message on the screen as well as receive an email notification stating that their request for access has been sent for review. If the user had already submitted a request for access or the user's account already exists, the user will get an on-screen message, "This email already exists in the user database" and will be unable to resubmit another request with that email address.
Any Admin that has been set up as a User Registration Approver (this is activated in the Permission table using the "can manage pending users") will receive an email notification that someone has applied for access to the system.
The Approver then goes in and reviews pending requests. If the user's request for access is approved, the user will receive an email notification with a link to the Set Password page. If the user's request is denied, the user's email notification will include a note from the Approver. The user can reapply at this point and will not get the on-screen message that the email already exists.
After successfully logging in, the user will land on the homepage as any user normally would (OR on the Terms & Conditions page, if one has been set up for this system), and the location will be the first one alphabetically from the list of the available locations selected by the user or modified by the Approver, providing that more than one location was allowed on the registration form and/or adjusted by the Approver.
Automatic Registration
The user will see the same "Don’t Have an Account? Click Here" link and the workflow will remain the same. The success message displayed to the field user will be slightly different, however, and will display instructions to check their email to complete the registration process. The notification email will be the same as if approved manually, with a link that will bring the user to the Set Password page. Note: Admins will NOT get an email notification for the auto-approval of pending users.
After resetting the password, the user will see the login screen again. After successfully logging in, the user will land on the homepage as any user normally would (OR on the Terms & Conditions page, if one has been set up for this system, and the location will be the first one alphabetically from the list of the available locations selected by the user, providing that more than one location was allowed on the registration form.