Adding Tags to Text
Tags may be added to existing text by highlighting the text that should be tagged and clicking the “Add/Edit Tag” button in the text editor, or by simply clicking the button without the need to highlight any text. If text is highlighted, then that text becomes the tag. If nothing is highlighted, the tag is placed within the text layer at the location of the cursor.

When the “Add/Edit Tag” button is clicked, a pop-up menu appears to select the type of tag:

Click on the buttons at the left to select the tag type. The example below shows a Text Tag. Each type of tag has a slightly different set of options, which will be covered in detail in the next section. User Style Options will be covered after each tag type has been discussed.

Tag Types in Detail
Text tags create a form field on the front end that end users can type (or copy) text into. Admin users can set parameters to control how the text field operates, including character limits on content, requiring content or requiring a change to the default content. Explanations of each field are below the screenshot.

- Title: The title appears above the form field on the front end. The title can be used to provide directions to the end user. The title does not appear on the template.
- Change: If “Change” is turned on, the end user MUST change the content within the field. This might be used if the default information is instructional in nature and would not be wanted in the finished template (such as “Type Headline Here”).
- Required: If “Required” is turned on, this means that the field must contain text. If “Required” is not turned on, the end user may leave the field blank in the finished document.
- Default: This field contains the actual text which appears on the template. If text was highlighted when the “Add/Edit Tag” button was clicked, that text will appear in this field. Note: there MUST be text in this field in order for the tag to be created, even if text is not required for template completion.
- Max Length: This field can be used to specify a max number of characters for the field (such as for numerical values).
- Sort: Only used for batch campaigns. See documentation on Campaign Management for additional information.
- Text Area: If “Text Area” is turned on, then this will allow the text field box to grow to accommodate the text, if it would otherwise overrun the original text box.
Back End Environment: The screenshot below shows how the tag appears on the template, how the tag is styled inside the editor and the corresponding entries inside the pop-up menu.

Front End Environment: The screenshot below shows how this tag appears to the end user when the text layer is clicked. Note the location of the title and the default text located within the form field.

Select Tag
Select tags create a drop-down menu that end users will use to select content. Admin users can control the styling parameters. Note: end users CANNOT edit the text nor can they choose to leave the field blank.

- Title: The title appears above the form field on the front end. The title can be used to provide directions to the end user. The title does not appear on the template
- Default: This field contains the actual text which appears on the template If text was highlighted when the “Add/Edit Tag” button was clicked, that text will appear in this field. Note: there MUST be text in this field in order for the tag to be created, even if text is not required for template completion. The Default could be the first item on the list, or it could be informational (such as “Select Headline”).
- Dropdown Options: This field contains the actual items to select in the list. To add items, type the name of the first item and then hit the carriage return. This adds the item to the list. Note: You cannot reorder the items in the list, so check spelling carefully as items are created. You can delete items by clicking the “x” next to the item name. End users can only select items from the list, they cannot edit this information. There is no way to create a “blank” field, so this tag always will have content.
- Sort: Only used for batch campaigns. See documentation on Campaign Management for additional information.
- Change: If “Change” is turned on, the end user MUST change the content within the field.

Back End Environment: The screenshot below shows how the tag appears on the template, how the tag is styled inside the editor and the corresponding entries inside the pop-up menu. Notice that not all of the text inside the text layer is tagged, just the portion “(make a selection)”. The period is outside of the tag because it is part of the sentence, not the tag selection. Also notice that “Change” is turned on. This is because we don’t want someone to finish the document without making a selection, because the sentence doesn’t make sense without an option selected.

Front End Environment: The template on the front end. Note that only the tagged text shows in the form field. The end user cannot edit any other text in this sentence.

Clicking on the field brings up the options that were entered into the Select tag. The default option appears at the top of the list:

If the end user attempts to close the window without making a selection, a warning appears (because the field has been set to “Change” on).

And here is the final text when the user has made their selection and closed the window.

User Tag
User Tags populate content directly from the User Table. The information filled in on the template will be for the User that is currently logged into the system.

- Title: The title appears above the form field on the front end. The title can be used to provide directions to the end user. The title does not appear on the template. The title is auto-filled with the field name, but it can be edited.
- Max Length: This field can be used to specify a max number of characters for the field.
- Editable: If “Editable” is turned on, then the end user can edit the information that automatically populates. This is helpful if your end users create materials on behalf of others.
- Field: This is a list of all the fields in the User Table. By default, this is First, Last (Names) and email address. If additional fields have been added, they will also appear in the drop-down menu.

- Sort: Only used for batch campaigns. See documentation on Campaign Management for additional information.
Back End Environment: Since User tags use data from the User table rather than information from the template, once the tag has been applied to text, the pop-up editor will reflect the tag information, but the template reflects the information of the user that is currently logged into the system.

It is often a good idea when using User tags to allow editability, since there is a possibility that the person creating the document is not the same as the individual’s information that should appear on the document. Content tags are another way to place a person’s information onto a template. Content tags would have more flexibility in adding different people into the template, but would have no ability to have styling options applied, so choose your tag accordingly.
Front End Environment: See the next section on Location Tags for an example of the front end experience that includes both User and Location tags.
Location Tag
Location Tags populate content directly from the Location Table. The information filled in will be for the Location that is currently selected.
- Title: The title appears above the form field on the front end. The title can be used to provide directions to the end user. The title does not appear on the template. The title is auto-filled with the field name, but it can be edited.
- Max Length: This field can be used to specify a max number of characters for the field.
- Editable: If “Editable” is turned on, then the end user can edit the information that automatically populates. This is helpful if your end users create materials on behalf of others.
- Field: This is a list of all the fields in the Location Table. If any additional fields have been added, they will also appear here. See documentation on “Location Tables” for more information on additional attributes.
- Sort: Only used for batch campaigns. See documentation on Campaign Management for additional information.

Back End Environment: This screenshot shows how the tags appear in the pop-up editor and how they populate on the template.

Front End Environment: This screenshot shows the front end with the form open. The titles of the fields reflect the name of the User or Location tag.
The screenshot to the right shows the location information of the current location. If the user selects a different location, the information will update to match the new location.


Content Tag
Content tags populate content that was created within the Content Database. In order to use a content tag, a content link must first be created for the template. For instructions on how to set up the Content Database and connect the information to a template, please refer to the following documentation: Content Database for creating the data and Content Links for connecting the data to an individual template. Once that has been done, the process for adding the tag to text is the same as any other tag: highlighting the relevant text and applying the tag (or applying the tag at the cursor point).
Since the content for the tag is handled differently the selections in the pop-up menu are also different. Notice we have no field title nor styling options. The title of the field is taken from the field name in the content category and we do not have styling options for content tags.

- Content Link: The selections available will be any content link that has been set up in the template.
- Field: The fields will be any text field that has been created in the content category referenced by the content link. The type of field is determined by the content category.
- Editable: Enabling editability will allow the end user to edit the content in the field.
Note: Selectable content in content tags MAY be edited, unlike selectable content using a Select tag, provided that the “Editable” button has been turned on.
Content Tags and Images
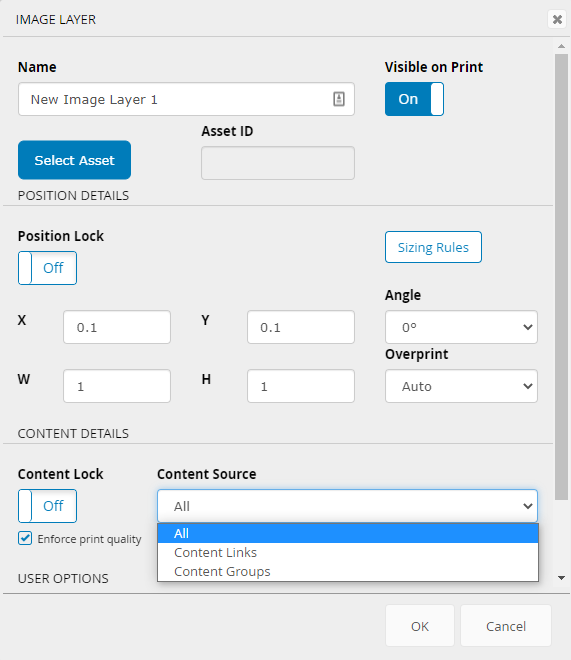
Content tags are the only type of tag that may reference an image. To apply a content tag to an image, Content Link should be chosen as the source in the image layer.
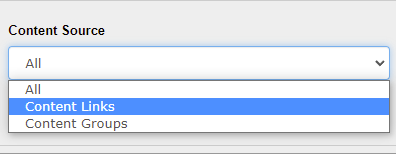
Once "Content Links" is chosen as the source, any content link applied to the template that has an image field as one of the fields within the category will show as available in the "Select Content Link" list. Once the link is chosen, the available image fields will be available in the "Select Content Field" list.
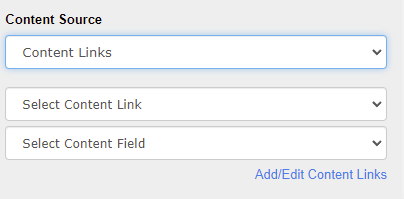
If “Content Link” is chosen as the content source for an image, then drop down menus will appear with the content links and associated fields to choose from. Note: only image type fields will be available for selection.
