Organizing Content Item Data
After you have created the Content Category, you will create Items for that Category that will be selectable by the End User. There are two ways to create items in the content database: manually or by uploading a CSV file.
Creating a Content Item Manually
- Navigate to the Admin section> Content tab > Content section > Campaign Content Items and Categories.
- Click on Add Item at the top right:

- In the Category drop-down, select the category that was just created:

- Name the item. This name will appear to your users in templates.
- Item Segmentation: Items can be made visible to certain locations or location groups via the Locations or Location Groups button. All locations/location groups available in the system will appear in the dropdown list.
- Note: If items are segmented by location or location group, there should be a default item made available to all locations to ensure all users have access to at least 1 item. If a user doesn't have access to at least one item, they will not be able to open the template.
- Add content to each field in the category. The fields will correspond to the fields created for the category. If updates are needed, click the Manage Categories and Fields button to add or remove fields. Once a field is created, the name and the type of field cannot be changed.
-
- Text Fields: Single text entry. This text can be formatted with line breaks, etc, if desired.
- Multiple-Text Fields: Add the text for the first entry and then click the Add Option button. You can add as many entries as you wish.
- Image Fields: Click the Choose Image button to open the Media Library and select your image. You can browse the entire library, or enter the asset name or ID in the search field.
- Multiple-Image Field: For this field type, you will add the asset ID # of each asset, separated by a comma.
-
- Once the necessary fields are filled out, click Save to bring you back to the main item page or click Save and Add Another Item to start adding a new item.
Important for Image Fields: It is highly recommended that all image fields have a value assigned (multiple image fields can contain a single image). Default items assigned to templates must have images assigned, or the template will not open.
Pro Tip: The Content Database will pull your data exactly as it has been entered. This means checking your fields for consistency in formatting data like phone numbers, addresses, capitalization, etc.
Creating Content Items via CSV Upload
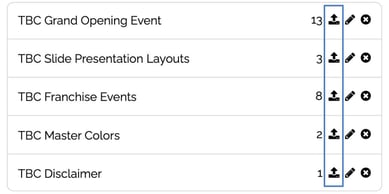
- You can access this feature in the Admin area under Campaign Content Items and Categories, by clicking the Manage Categories and Fields button.
- You will see the Upload button next to the Edit button
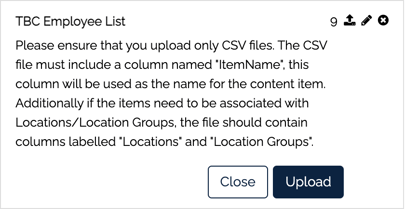
- Upon clicking the Upload icon, it opens an accordion with the instructions and the Upload button. Clicking the Upload button will allow you to select your CSV file from your computer and will start the item creation process.
- To upload to a category, the category and fields need to be created before uploading the content.
- Once your items have been created, you will get a success message that looks like this and you can close out of the module to review your items.

- If the file is missing a required header or something is wrong with the file setup, you will get an error message and the items will not be created.
Preparing your CSV file
- You must create a CSV file; the system will not accept Excel files.
- Each column in the CSV file should correspond to a field in the selected Category
- Each row in the CSV file should correspond to an item in the selected Category
- Your CSV column headers will be "ItemName" (what your content item should be called), "Locations" if you want to assign the item to a location (the column content will be the unique identifier for the location), and then the field names for the fields in the target category. If you want to upload content for location groups, "Location Groups" will be the column header. The order doesn't matter, just that the column headers are named correctly.
- This feature supports all field types - Text, Image, Multi-text, and Multi-image.
- For multi-text options with commas, remove the commas prior to upload as this may cause unexpected upload behavior.
- For multi-image options, you'll put all the asset IDs in one cell and separate them by commas.
- Item names have a limit of 256 characters; any item names with more characters will be skipped.
- Your CSV file can contain up to 10,000 items.
Miscellaneous Notes
- This feature will auto-create content items for you and assign them to locations. It will not look for potential duplicate items, it will just upload a new version.
- You can upload to empty categories or upload additional items to existing categories.